
How to Create a Balance Sheet by Location in QuickBooks Online
A Balance Sheet by location breaks your financial position into a column per location (region, store, department, or tracked entity) so you can see where your cash, receivables, and liabilities actually sit.
This report needs location tracking turned on first. See how to turn on location tracking.
New to QuickBooks Online's modern view? See how it compares to the classic view.
Steps
- Open the Balance Sheet report
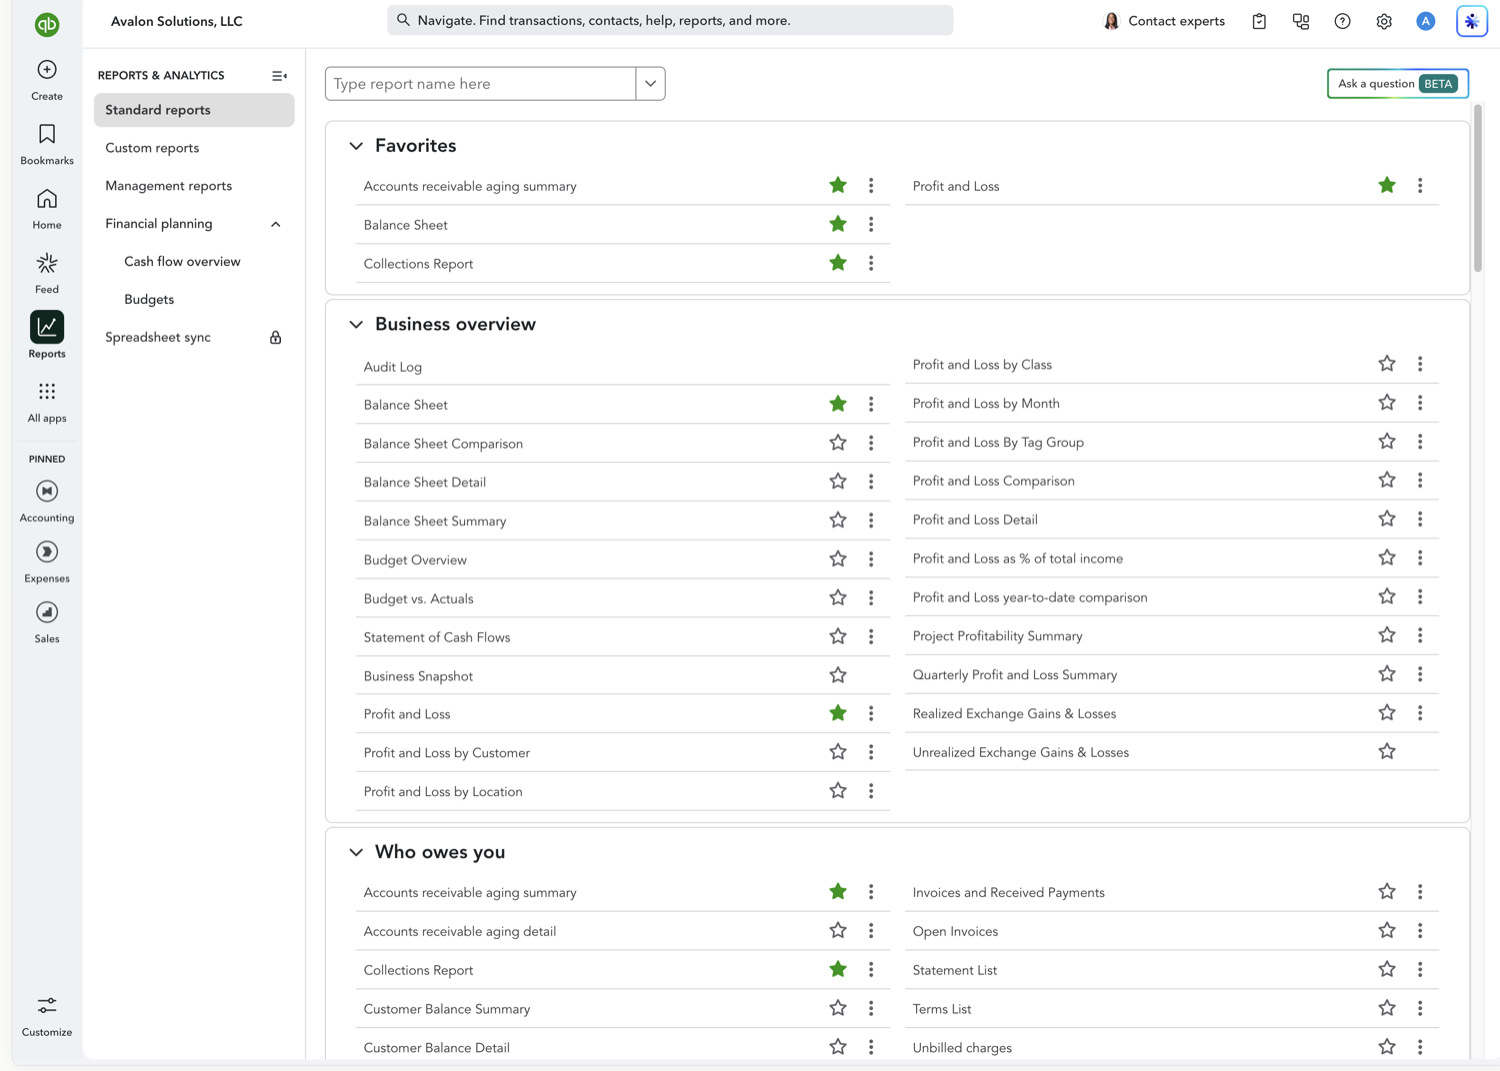
Go to Reports and, under Business overview, select "Balance Sheet," then set your as-of date.
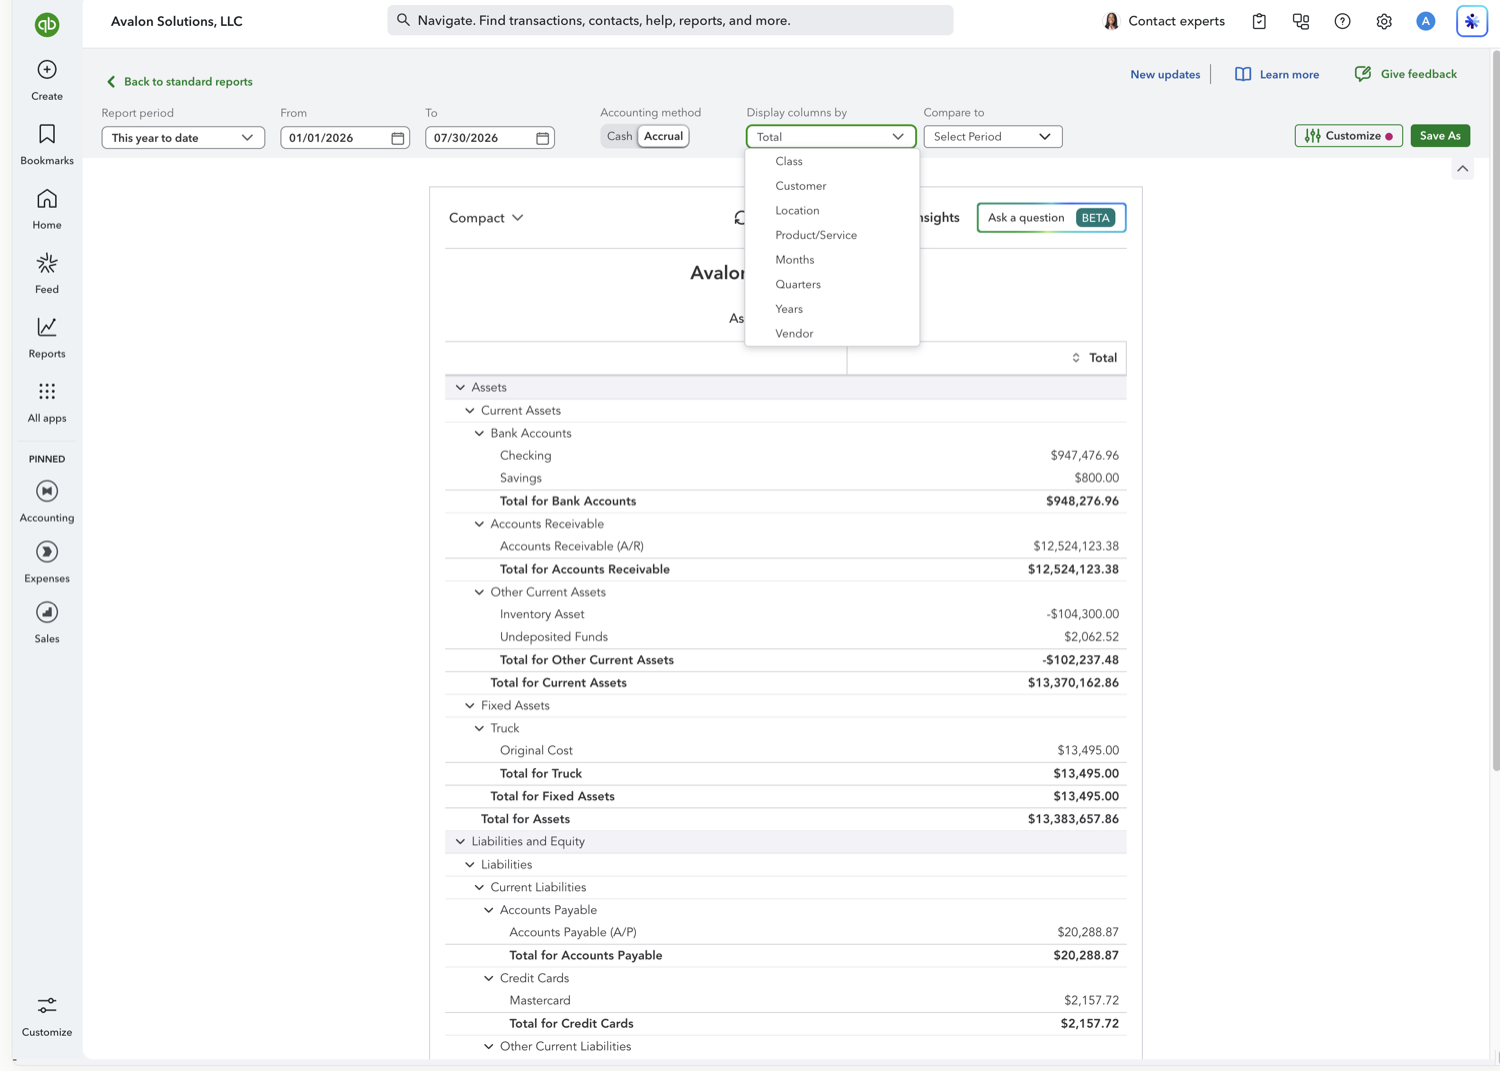
- Set "Display columns by" to Location
Open the "Display columns by" dropdown and choose Location. QuickBooks adds a column per location, plus a "Not specified" column for amounts with no location assigned.
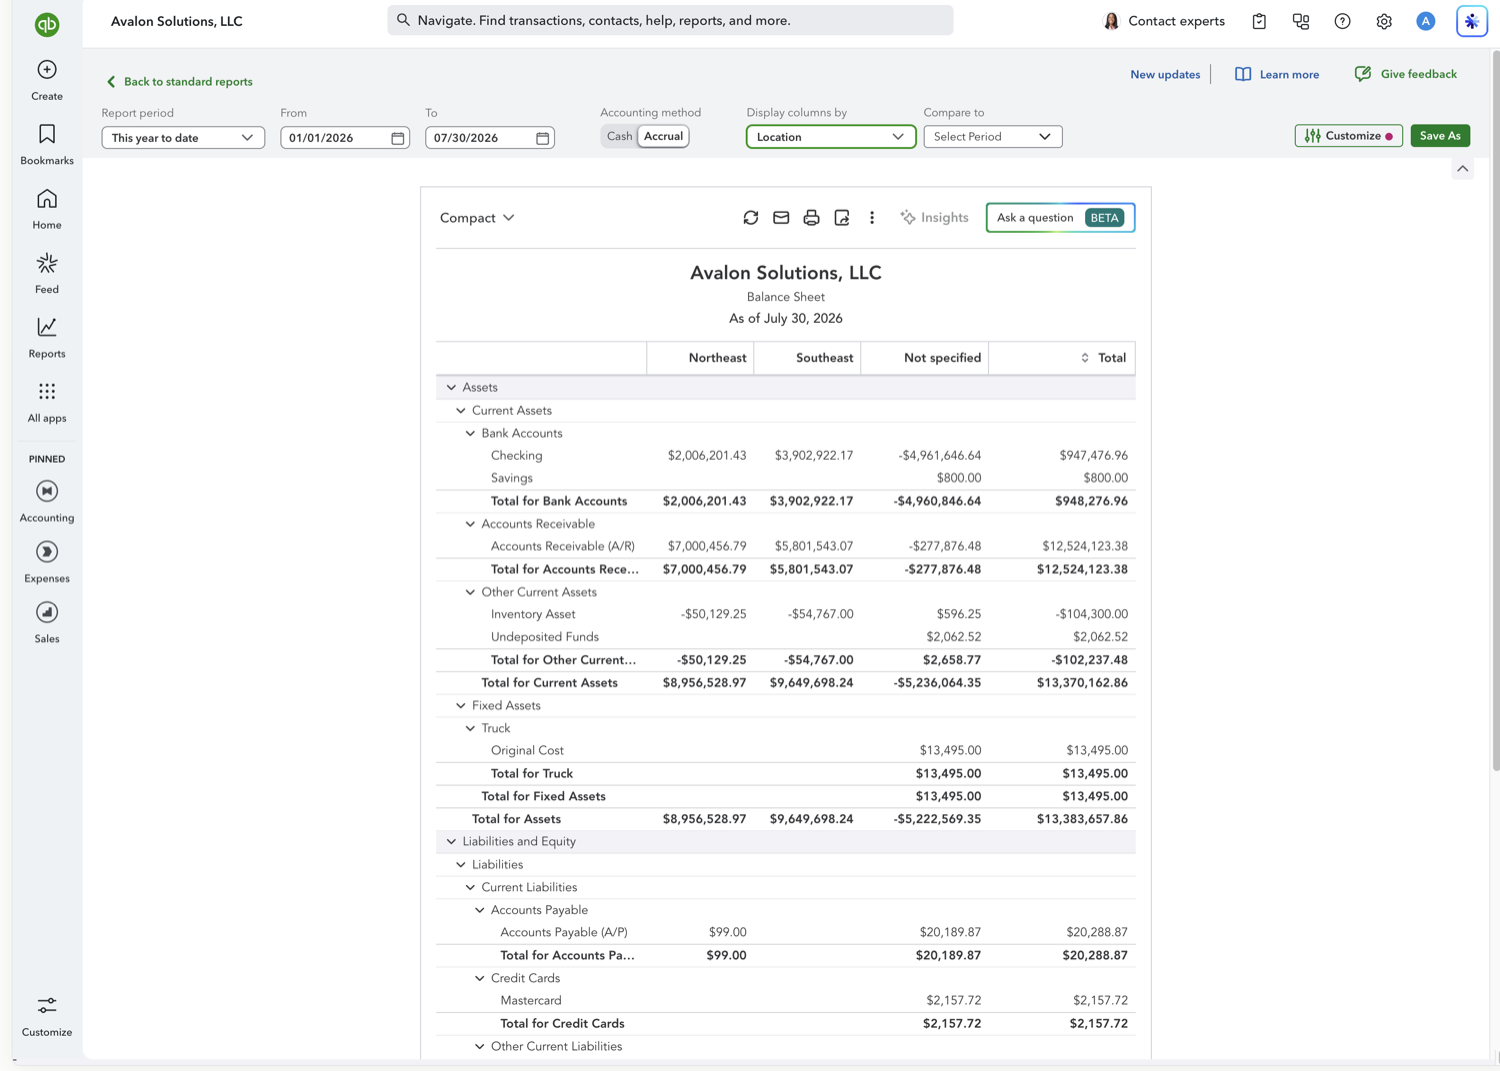
- Review the location columns
Each location gets its own column of assets, liabilities, and equity, with a Total column on the right. Because more everyday transactions tend to carry a location than a class, this view is usually fuller than a Balance Sheet by class.
Frequently asked questions
What is the "Not specified" column?
It holds balances from transactions that never had a location assigned. To reduce it, assign locations consistently when you enter transactions.
Does this require a specific QuickBooks plan?
Yes. Location tracking is available on QuickBooks Online Plus and Advanced.
Tired of rebuilding reports? Need more customization?
Retriever pulls QuickBooks Online reports like this one into Google Sheets on a schedule. They refresh on their own, and once the data is in Sheets you can pivot, chart, and customize it far beyond QuickBooks' fixed report layouts.
See how Retriever worksRelated report guides
Questions about this report? Reach out at aubrey@retrieverhq.com.

© 2026 Avalon Innovation Corporation. All rights reserved.
🇺🇸 Built in Orange County, California